I've procrastinated enough! I have been the chief procrastinator at home for the past 2 months when it's come to this blog, and I have no reason or excuses as to why. There has been food cooked, there have been times when the computer and myself are free for this meaningful dialogue, but it just hasn't happened. Armed with a cup of tea (Rooibos to be exact), I am now making inroads to the various list of blog posts running through my head.
And what better way to start my first blog from absence with the superfood du jour, quinoa (pronounced keen-wa). Those of you that read this blog regularly will remember a post from the beginning of the year about this wonder grain. And it's popularity has just been growing! Move over couscous, brown rice and any other grain pretending, this bad boy is the shizz! At a recent dinner party, not hosted by us which was even better, we got onto the subject of this exceptional ingredient. And after ticking off a long list of goodies - it's incredibly low GI, gluten free, high in protein, has antioxidants, etc, etc - the only real problem we found is that it is tasteless. Although Marty pointed out that this is not really a problem because it makes it versatile and can be used in so many dishes because it adopts the flavours of that dish. Another pro!! Quite frankly, if quinoa was a superhero it'd be Superman, without the Kryptonite.
So we know this is superfood, and now we know there's not much flavour, so what do you do with it? Marty's restaurant has it in their lamb salad, someone else was telling me about a Mexican restaurant that does a spicy salad with it, and I'm going to introduce you to my newest Summer Salad that has been added to the BBQ repertoire. A quick and easy Quinoa salad. And to make it even easier here's a link so you can enjoy it, and find some more tasty quinoa salads. http://www.savvyvegetarian.com/vegetarian-recipes/quinoa-salad.php You'll notice it's not only a vegetarian salad but vegan too, so is extremely helpful when guests arrive of that persuasion. For my followers in warmer climates, make the salad and chill it. Add the seeds and nuts and you don't even have to worry about a protein with it, so on those stinking hot summer nights or days when you want something fresh, healthy and filling this is the perfect choice.
The other thing I love about it, is that there's almost always enough left over for lunch the next day so you can feel very virtuous if you've over-indulged with BBQ food the day before, because let's face it, who hasn't!
Now, it's also really important to give the grain a good soak to get rid of the saponin which coats it because that will leave a bitter taste. I think cooking for as long as the recipe suggests overcooks it a little and it gets a bit mushy. Once the little white tail shows it's pretty much cooked and if you like your grains and pulses cooked al dente then taste after 5-7, then 10minutes to see how you feel about the texture. I would also add the toasted seeds and nuts as I serve to keep them crunchy, and not mixed through and then chilled.
I hope you enjoy it and if you have a BBQ failsafe salad that comes out each time I'd love to hear about it and get some recipes from you.
Ciao,
xoxo
P.S I'm pretty sure my camera has a picture of this and MANY other delights so I'll do an upload soon! I may even have a post devoted to pictures! Who knows!!
Wednesday, November 30, 2011
Tuesday, September 13, 2011
Move over Martha...
A very industrious bug bit me yesterday, and quite frankly I'd be very happy to be at home today still being bit that by that bug and churning out jams and chutneys and whatever 'homely' things I can get my hands onto.
It all started on Sunday when I did a quick once-over the fridge to see what was needed in the grocery shopping. There, stuck at the back of the fridge was the bag of kiwifruit that Marty had sworn black and blue he was going to eat and enjoy! They were on special, 8 for $2 - bargain, and although I'll eat the odd one here and there, I'm not the world's greatest fan. But a week on, there they sat taunting me with their 'uneatenness'. So, I reached up onto the shelf for the Edmond's Cookbook for a kiwifruit chutney or jam recipe. It seemed an obvious starting point, and they certainly didn't disappoint. AND, it was easy!
My 8 kiwifruit were peeled and chopped, I even had a couple of old apples in the fridge that got used up in the recipe. However, presumption is the mother of all f%#k ups, and I presumed there was malt vinegar in the pantry. There wasn't and chutney-making was halted until Marty got home. I did have red wine vinegar, but learning my previous lesson with presumptions, I didn't presume that it would be a perfectly apt substitute. I couldn't get hold of the expert at the time, so back to waiting. As a good housewife I used this time productively to hang out washing, wash dishes and prepare the meat for dinner. And then rewarded my good behaviour with a glass of red! On his arrival, he informed me that yes red or white wine vinegar would have been fine and that malt vinegar was just what was 'in' at the time of the recipe. Good to know.
Chutney making resumed. The base of ingredients - spices, onions, apples, vinegar - were set to a gentle boil until they thickened and soften and then the kiwifruit was added. After an hour of cooking, it was set aside to cool, and I must admit that it tasted pretty good when I sampled a little before it went into the jar. I will definitely give a teaspoon a go tonight with my dinner, and we have a jar of it that will be a nice accompaniment to cheeses, or even a curry.
All this industry has got my fingers itching and I'm looking forward to the next fruit or vegetable that comes in excess. I'm hoping for some peppers and chillies so I can give Jamie's Cheeky Chili Chutney a go, and I can't wait to get the tomato plants into the garden so that next year we can make some more sun dried tomatoes, but also some tomato chutneys and sauces.
Now I'm going to spend the afternoon looking up other interesting things to preserve and make, and maybe another visit to the supermarket to get some more kiwifruit if it tastes good. Would love to try it with the white wine vinegar so that the actual chutney can retain some of the green of the kiwifruit, as opposed to it all turning a darker shade of brown. I'll explore the options before I succumb to green food colouring!
Ciao
xoxo
Friday, September 02, 2011
Some dining out delights...
I don't often, if ever review a restaurant except in conversation but there were 2 a couple of weeks ago that warrant a mention. It was my birthday a couple of weeks ago, yippee! I was blessed to not only have my wonderful husband for the weekend as he took a day off, but a whole week's holiday and most importantly a visit from the parental unit!
We walked ourselves around Melbourne's Art Precinct and shopped a little but most importantly dined in a couple of fabulous spots. The first on the Saturday night was Bistro Thierry on Malvern road. A true French bistro and a fantastic meal! I was too consumed by my food to take photos of every one's dishes so you'll just have to let your imagination wander free! I had perused the menu beforehand, as you do, and had decided on dessert, but i was waiting to see what my dinner companions ordered and how I felt that evening. We all had something different as an entree which was great. We all went pretty traditional except the chef. Dad had lambs brains, which he enjoyed. Mom had the French onion soup, which was delicious but a little rich for her, Marty had the calamari and I had l'escargot. The little snails were drowning in a lake of garlic and parsley butter and they were fabulous. I did use some of the freshly cut baguette to soak up the garlic butter and I could have had double the portion, but I'm really glad it was the size it was, light and delicious, because my main was fantastic!
Again, I went a little more traditional and had the duck which was roasted with oranges and served with a plum sauce. Marty had Steak Frites - steak and chips essentially, Mom and Dad had the flounder special - a whole flounder cooked to perfection. All delicious, and mine was the perfect size!
However, the dessert was by far the stand out of the meal and my mouth is watering just thinking about it! Mom and Dad shared the Crepe Suzette which I'm told was lovely! And Marty had the Profiterole, but I had the Souffle Chocolat. Unbelievable! When it arrived at the table the waiter - a surly Frenchman who eventually cracked a grin - broke open the top of it and poured thick dark chocolate sauce into the chocolaty goodness that as the heart of this dessert. It was served with vanilla bean ice cream which offset the rich goodness that this dish was. The ganache centre was melt-in-your-mouth, and the chocolate sauce dreamy. I kept filling up my cup of goodness until there was nothing left! Had it not been a classy establishment I would have been tempted to lick the bowl out.
On the Sunday, after taking in the sunshine at the Art Centre Market, we took a tram down to Lygon Street to show the folks 'Little Italy" and the various landmarks there - Brunetti's mainly. We purchased some cakes for dessert that night, but went across the road to D.O.C for a bite to eat. The food gods must have been smiling down on us because as we walked up a table in the sun opened up and there wasn't even a queue! We shared a baby spinach salad, a prosciutto pizza and a anchovy, olive, tomato pizza. I don't know if it was just the pizza or if the weather, the cold beer and the most wonderful company, contributed to that being one of the best Italian meals I've had here so far! The prosciutto and buffalo mozzarella pizza was by far my favourite and had a healthy amount of topping.
And then that night, Marty revisited the Beef Tagine and we had little bites of Brunetti's pastries to round it all off! All in all, a gastronomically pleasing weekend and one I had to work off the next week in the gym! I can't wait to do it all again!
Ciao
xoxo
Wednesday, August 03, 2011
Healthy doesn't have to be boring!
Marty and I took a walk on Monday morning and in our meandering discussions we got onto cooking in schools. Not just tuck shops and what's offered but actually what's taught, subjects like Home Economics and Food Technology. Now, neither of us have been in school for quite a while now - 10yrs plus - and I was not educated on this side of the world, but scary statistics do show that kids just don't know how to cook, or in fact what different things are. Anyone who's ever watched Jamie's Food Revolution in the States will agree with me that when your children only know what a potato is because of the fries they have at lunch, there's a serious reason for concern.
Thanks to the Masterchef revolution and the nice little spin off of Junior Masterchef families and children are eating together and cooking more, but honestly the most beneficial episode each week is actually the Masterclass when you can learn something. So, what do you ask was Marty's solution or at least, what did this conversation really have to do with anything? Well, he felt that if everyone was taught about nutrition and food and cooking in school as a mandatory part of the syllabus like physical education, Maths, English, etc it could actually help with the growing problems of obesity and all it's related diseases.
At the moment 20 - 25% of Australian children are overweight or obese and 50% of obese adolescents continue to be obese as adults. And according to international statistics this trend is worldwide. What shows is that our kids are educated to eat well, the chances of growing into healthy adults is increased. The scariest statistic? "If weight gain continues the path it is following, by the year 2020, 80% of all Australian adults and a third of all children will be overweight or obese." - http://www.child-obesity.info/child-health/alarming-statistics-about-child-obesity-in-australia.html
So, I asked the man who daily crusades against Maccas, what can be taught? Surely the information is out there, but it's not really that it's that when you're fed a high fat, high sugar, salt added diet, everything else tastes bland and boring. He answered, teach them how to cook healthy and tasty! Easier said than done my friend!! When I met my chef he loved nothing more than to cook with butter, salt and those contributed in a BIG way to years of weight gain and loss for me! I could have refused...BUT it tasted so good!! I think the key with those decadent ingredients, as I've found out the hard, long way around is moderation, moderation and if you're not sure moderation! They should be the exception not the rule! We've all been affected by the reverse of this though, the underseasoned, overcooked veggies or meat! So it's about finding a happy medium and we're so lucky to be living in a time where sourcing our food locally, and growing some of it ourselves is very 'in'. And that's the trick. Fresh produce, fresh herbs, free range meat and chicken, these all taste better. Even if you're living in an apartment you can find a nice rectangular pot and grow some herbs in a sunny window. At the moment our herb garden is looking meager with just parsley and mint, but as the weather gets better the basil, coriander and thyme will go in. These particularly flavoursome herbs add punch and depth to your cooking. You'll also be surprised if you try the free range chicken at the supermarket over the mass produced how much darker the meat is and tastier. The meat's darker because the animal is more active and there is more blood flow = more flavour. Another excellent addition to your grocery list is fresh chili! I have never been a lover of hot, spicy foods like other people in my life but even I add a little chili here and there to accent a dish.
The last obvious place to find flavour is in the cooking process. Bear in mind there is a difference between slow-cooked and over-cooked. When you're slow-cooking a stew you're browned off meat to create flavour, chopped up your veg to make a mirepoix and even added bay leaves and thyme as your fresh or dried herbs. What you wouldn't have put in is a lot of salt because the process will just make everything more salty. When you drown the veggies in a huge pot of water and cook it to a tasteless sludge, that is overcooking, and no amount of added salt will make that taste any better! Stir frying and steaming also helps to accentuate the natural flavours of veggies and meat alike.
On Monday night, after our discussion, Marty cooked up some Thai cakes with salmon and prawn in them instead of crab. He used fresh coriander, seasoned lightly with flaky sea salt and added in a fresh chili. He used one spray of olive oil to the non-stick frying pan out of habit, and that was all the oil used. He baked them in the oven after they had been browned and each side and they were delicious. It proved the point that healthy doesn't have to be boring, and if we could all use a little imagination we'd be eating very differently!
Some food for thought I hope! Would be interested to hear your views!
Ciao
xoxo
Monday, July 25, 2011
Chapter 2 in the stuffed vegetable book - Stuffed Zucchini this time
I hope that this post doesn't come out as disjointed or non-sensical, because instead of devoting my full attention to it I am attempting to multi-task while watching a guilty pleasure of mine but I really wanted to get this out and down 'on paper' so to speak.
It's been a little while since I've been on this blog due to procrastination, and the only way to get going, is to get going! I hope you've tried out and enjoyed the Stuffed Capsicums and now another one I love to make is the Stuffed Zucchini. Marty actually showed me how to add maximum flavour to this dish and not only whip up something healthy, but filling and delicious. I often find that the healthy food we're expected to eat can be so devoid of flavour, due to the fact that we're over-exposed to added sugar and salt. I do believe that a limited amount of salt can be added into the diet as long as it is a flaky sea salt and iodised because then you have most beneficial type, but instead of over-seasoning, adding fresh or even sometimes dried herbs can boost the flavours in a dish remarkably. I'm looking forward to the the warmer weather to replant and develop the herb garden for this very reason.
Now this recipe is so simply you'll be whipping it up weekly. I find that the filling is enough for 2, but if I make the extra I just pop it in the fridge for lunch the next day. This is another great recipe to adapt for vegetarians!
What you'll need:
A zucchini (courgette) per person
Filling:
A carrot, chopped or grated
Small can of corn
Garlic
Onion
Tomato paste
Choice of tuna. chicken or kidney beans
Hollow out the zucchini. Cook the protein with the onion and garlic. Add the carrot and corn and the insides of the zucchini, and then mash or mix in some tomato paste to taste and then stuff the mixture into the hollowed out zucchini. If you'd like to grate some cheese over the top, otherwise pop into the oven for 10 minutes then eat!
It really is as simple as that. Sometimes I add some fresh time, and parsley is delicious too. You can add in some chili, or Mexican spices and that would work beautifully.
After 10 minutes at 190 deg, it should all be soft and ready to eat. I like my carrots diced and still a little crunchy, so I tend to cook the chicken for as long as I can in the pan to make sure it is completely done, and I dice it up really small.
Enjoy this easy meal and I look forward to hearing what you think! Also decided halfway through this, not to watch TV anymore so I should have made sense!
See ya
xoxo
Wednesday, July 06, 2011
Stuffed Capsicums...another healthy alternative!
Today, I have been practising the fine art of procrastination. you know those days, you start off with a great big list, you hurtle through all the easy stuff and finally you're left with the bits and pieces you either didn't really want to do, think may take a long time, or are just not quite as much fun as playing endless games of Solitaire, or Spider Solitaire, or Hearts, or Mahjong. And this is the point I've got to today, and after realising how long it's been since I've blogged at all, and that I have piles of photos to upload from my camera too, I have decided to do something about it! Easier said than done let me tell you.
What I wanted to share with you today is a little recipe that's fast becoming a favourite, and to top off is deliciously healthy, and even suitable for the veggies out there. It's a recipe my trainer has given me for Stuffed Capsicums and is as easy as it is tasty. The recipe is 1 portion, but obviously that can be made for as many people as possible. What I will say is you don't need to double the recipe for 2, triple it for 3, etc as it a large recipe to begin with. I double it for 3 serves, or just make sure the capsicums are large enough to accommodate all the veg.
This version is gluten free as well, double whammy people!!
So, what you'll need:
1 Capsicum
1 Zucchini (courgette), grated
1 Carrot, grated
1 Yellow squash (patty pan/scallopino depending on where you come from!), grated
1 onion chopped up
garlic clove
Protein of your choice
And what you do:
Mix the grated up ingredients in bowl, season if you feel like it. I don't normally. In a pan, heat a little oil, or use a non-stick frying pan and brown the onions with the garlic. Now, you can chop up the clove, or leave whole and remove later, depending on how much garlic flavour you want. If you're adding a protein the next step is applicable to you - when I'm adding chicken to this dish, I chop it up and cook it with the onions in the pan, if I'm having fish or beef or even a lamb chop with it, I keep that separate. Once those onions are a little brown and soft, add your grated ingredients, mix it up then take off heat.
With your capsicums, cut them in half, take out the pips and bits, and then stuff your mixture into them. You're going to put these into an ovenproof dish and into the oven for about 25-30mins on 180-200 deg.
Once cooked, serve. As I said this does roughly one large size capsicum, and you really don't need anything else with it, but you could serve it with a salad or some brown rice maybe! You could even halve the recipe to be used as a side dish, keep as is for a side dish for 2, or double for a side dish for 4. You get the picture.
Anyone else got a healthy recipe they'd like to share? Email it to me so we can give it a go, and I'll let you know how it went.
Ciao
xoxo
Thursday, June 09, 2011
A Healthy digression...
It's certainly been a while since I've put fingers to keyboard, and there have certainly been some culinary developments chez moi, but alas no Jamie recipes have been cooked. The main reason for that is this particular foodie has embarked on a period of delayed gratification and is opting for a healthier menu for a little while. That's not to say there haven't been some very interesting recipes, and there will definitely be more to come, and Jamie should be back in about November/December time. No doubt he'll have a new book out by then we can sink our teeth into as well!
The chef has traded in his cream and butter for healthier alternatives with great success. So much flavour can come from things as simple as fresh herbs, garlic, lemons and chillies, without piling on the additional calories. We have been developing some really healthy and tasty recipes that I would love to share with you, and I certainly will, but firstly I have to tell you about my delicious Chicken, Corn and Celery Soup. It was a collaborative effort, with Marty adding his 2 cents worth of handy hints and me making it up as I went along. I developed a very vague recipe and used a little intuition that I've picked up since I've been blogging along! As it is winter and the weather is getting decidedly chilly, a good chicken soup is always a comfort. This one is not only tasty, but also very healthy and pretty simple to do. I'd say the recipe could comfortably feed 4, and if you're partaking in smaller portions, more like 5!
The ingredients:
2 free range chicken breasts.
2 carrots
2 celery stalks
1 onion
couple of garlic cloves, peeled
3 bay leaves (dried is fine)
1 can corn kernels
1lt veggie stock
The method:
1. The first thing you want to do is poach the chicken. When questioned about the difference between poaching and boiling, Marty explained that poaching is a slower simmer as opposed to a full boil. I popped the chicken in a pot with the garlic cloves and the bay leaves, and enough stock to cover it all and a little extra water on top of that.
2. Meanwhile, in my large pot I made up my mirepoix. Remember that from last post? If you don't, you dice the carrots, celery and onion and slowly saute that. That's going to create a lot of the flavour base. To keep the calorie count down I used a little olive oil spray on the bottom of the pot so that it didn't stick.
3. When the chicken has poached, remove it from the stock and let it cool a little. Keep the stock as you will add that to the veggies. Once that chicken has cooled enough to touch shred it.
4. Add your can or corn kernels to the large pot - I added liquid and all - followed by the chicken and give it all a good stir around.
5. Finally add the stock from the chicken pot and whatever's left of the litre and then more water if you want. I add about 500ml - 1lt extra water because I wanted a bit more broth.
6. The neither pop it into an over on 170 or leave on the stove top at a medium heat to simmer and cook away. I think it took about 30-40min.
And serve as is, or with some bread. This was a great filling meal all on it's own, and once it had cooled I portioned off 3 serves to be frozen for a lunch and a couple of dinners, and had a bowl left for Marty when he got home. If like me you're only cooking for 1 or 2 people, don't halve the recipe, just freeze some for easy dinners when you can't be bothered cooking.
I hope you enjoy it!
Ciao,
xoxo
Friday, May 20, 2011
Dinner Party? A cheat's guide to making it easier.
Well, winter has set in, and this dynamic duo have gone into a little bit of a hibernation period. What with a warm house and great recipes to try, it really doesn't seem that bad! However, I decided to have some friends around for dinner this coming Saturday night, and as the chef will be cooking for the patrons of his place of employ, the cooking was to be left up to yours truly. As there are about 5 people coming over, and this is not an episode of Come dine with me, I wanted to be prepared, not stuck in a kitchen, and certainly not getting stressed out.
I decided on Lasagne, Italian salad, garlic bread and Apple Crumble for dessert. Lasagne because I can kinda make that, with some help, salad and garlic bread - 'nuff said, and Apple Crumble, because that is a tried and true dessert I can do! So what's cheating you ask, besides potentially buying the garlic bread - which I'm not- and getting a ready-made salad - which is almost true? I made the lasagne with Marty on Monday and was given a basic tutorial in the finer points of cooking, froze it, and will defrost it on Friday to pop in the oven Saturday. Here's hoping it tastes delicious, that it has the right balance of sauce, but isn't too dry or runny, and the gorgeous flavours we worked on are all there!
To the first step of making this relatively easy Italian meal. The most important part and most essential ingredient is flavour. Now, I remember when my mom would make Spag Bol, and chops up the onions, carrots, garlic, and then add some bacon to it. She may have used celery too - correct me if I"m wrong mom! And now, I'm standing in the kitchen being instructed to dice some carrots, while the chef deals with the onions and celery. We're making a mirepoix (mirror-pwa), not just randomly chopping up veggies. This is the basis to stocks, meat dishes if you add bacon to it too, soups ans stews. But first, we popped some oil into the pot, brought it to a medium heat, added a couple of garlic cloves - a side note was we actually added some of our garlic-infused oil - some basil leaves, and thyme. Once this was all mixed through we added the onions and began to saute, then the onions and celery. This was cooked so that it was starting to soften, but not colour too much, and then removed so that the mince could be cooked off. This time we just used our garlic oil, which was delicious and easy to do and tasted delicious. Marty cooked the meat off in sections, added the mirepoix to it when done and then in with some tomato sauce (again we've used the Five Brothers Summer Tomato Basil Pasta Sauce) and stock. Left to bubble along while the white sauce was made.
Now the white sauce was the main reason for Marty's help as it's not something I've ever really known how to make and the 1 or 2 times it's been attempted have been disastrous. I'm not going to get into to as it's probably another discussion for another time, and really needs a demo!
Layer the lasagne, cooked for 30-40min at 180deg, and then leave to cool then freeze, if you're doing my cheat and cooking your main earlier than the party! So know, the night before all I need to do is take it out the freezer, prepare my garlic bread and cook up my apples if there's time.
On the Saturday - as I'll be working till 6pm - all that needs to happen is the table can be set, lasagne and garlic bread in the oven, salad tossed and crumble assembled to go into the oven. And a large glass of red wine poured. That sounds a lot easier then slaving away in a kitchen all day! Hopefully everyone enjoys it.
I used the mirepoix again this week to cook up a delicious Beef and Veg soup, and the flavours were lovely. Again I used the garlic oil and it gave a very subtle garlic taste without the fear of chomping into a great big clove of garlic. It is actually a French culinary term from the 18th century that was named after a Duc de Mirepoix, a region in Languedoc. This method had been used well before that, and in Italian it is known as soffritto.
Au Revoir
xoxo
Monday, May 02, 2011
Some really useful tools.
So, Masterchef Australia started again last night, and after my boycott on Season 2, I feel like I can watch Season 3 without wanting to smack George Calombaris' moving hands and telling Matt Preston to stop being an idiot. Gary is still my favourite! I'm also hoping we don't have to see much of Donna Hay. She bugs me. I digress.
Marty's making a chicken pie tonight and not really in the mood to teach, maybe he wants to keep his secret sauce, a secret; so we had a discussion about the most useful and necessary implements in our kitchen.
The Top 5 must haves in the kitchen according to us are, and in no particular order:
1. A good knife
2. A good pot - a Le Creuset casserole pot. Cast iron that stands the test of time, has a lifetime guarantee and can be used in the oven and on top.
3. A big, solid chopping board
4. A good pan - a great non-stick and also one that can go into the oven. This may mean you have to have 2. The funniest story about ours is that our 2 most used pans ever are a Le Creuset grill pan that was a wedding present, and a flat large pan that can be used in the oven and on top, that my mom was throwing out and passed on to me with the '2nds' when setting up our house. So mom - that pan has stood the test of time and is still being used daily. I am truly the queen of the 1 pan wonder!
5. A couple of good wooden spoons!
Our Top 5 ingredients, in order:
1. Olive oil - we often by the big canister on special and have a beautiful bottle that we keep it in. I even use an olive oil spray if I'm needing to fry something to keep it healthy.
2. Iodised flaky sea salt and cracked pepper. I don't think I can emphasise the importance of this type of salt. When you use flaky sea salt, and it really should be iodised for the various health benefits, you use less salt generally because you get a better flavour, and it's better for you. It's marginally more expensive but a box of it lasts us over a month, if not more. You will notice the difference. A certain amount of salt is required in our diets, and when you season correctly you use less sauces and additives that have hidden calories and preservatives in them.
3. Garlic
4. Lemons
5. Fresh herbs
And some other things you might need and like -
A good peeler - don't laugh, but Tupperware's is the bomb!
Mixing bowls
A food processor with blender
All the above make up a basic kitchen and there is so much that can be added. I love my servingware and glassware and will happily say that I'm a little addicted to the purchase of said -wares. So I think I have a fair array of bowls and plates, and will continue to add to it I'm sure. We also have a fabulous selection of knives and utensils, dried spices and a small fresh herb garden, and our slowly expanding oils and preserves. It all makes for an interesting kitchen and I hope you can use some of this information!
Happy cooking
xoxo
"Everyone should know how to make a good stew!" - Chef Marty
Quote from the chef! He was certainly feeling proud of himself last night, because it definitely was a good stew. Sunday, 1st of May in Melbourne was a chilly one after the truly beautiful autumn week we had. The skies clouded over and threatened to rain for most of the afternoon, until the heavens finally made that commitment and opened. We had done our groceries by this stage, and a stew was already on the cards accompanied by DVDs and a warm blankie.
And so chef Marty decided it would a teaching kitchen, and armed with a glass of red, I attempted to take notes. This is the reason for the hasty blog, as I am more than likely to forget the pearls of wisdom if they are not recorded quick smart.
"The secret to a great stew - is about sealing the meat and getting the flavour right up front"- Martin Haines.
There are a number of vessels for this stew - a slow cooker for those who want to put it on in the morning before work, a casserole pot that can go on the stove top to be slowly cooked, or the easiest and most popular - a good casserole pot that you can seal off everything in,and pop in the oven for a couple of hours on a lower heat. I'm not sure if I've mentioned it but our favourite kitchen item is definitely our amazing Le Creuset casserole pot. There is nothing quite like it for quality and value. A lifetime guarantee on the cast iron pot, and the ability to use it for just about anything. My mom certainly had a casserole pot that was used for so many dishes, that I made sure I had one of my own!
Right, let's make a stew! Firstly, you want to chop up your carrots, celery, leek, mushrooms and onion. A lug of olive oil into the pot and heat that up to a medium heat, and your garlic cloves (whole, peeled, slightly squished) and thyme can be added to that. Then add that chopped up veg and saute that off. So that means you want to cook it off lightly and get a little bit of colour going and those veg slightly softened.
Once that's been done, remove from the pot and pop aside. Now here's where things are different from what I've always known, and if you do your meat first, I recommend you try it this way and see the amazing difference if flavour - if you do - and if you don't let me know!
Once that veg has been removed, a little more olive oil in the pot and you want to add the meat. We used beef osso bucco, but gravy beef, blade steak, any cheaper cut of meat is great. This is a cost-effective dinner and because of the slow-cooking, you don't need expensive meat, it's actually better with cheaper cuts! And the secret he was talking about is now - seal that meat off with some seasoning. And not just a light colouring. You really want to get that meat cooked and coloured. It was easily a good 5 minutes of cooking. Once that meat is sealed, add a couple of large pinches of flour, a little salt and then your sauteed veg. And cook these all up together for a little. Using your wooden spoon, scrape the bottom of the pot to get all that flavour mixed through the stew. Add your stock - another good stew secret is decent stock. You can make your own, use it from previous stews that you've frozen, or we use Campbell's Salt Reduced Beef/Chicken/Veg whichever is appropriate. Add enough to cover the base and mix it through, then add some but keep stirring everything together and add a little more to cover. The longer you want to cook it the more stock you need to use because that will cook down and caramelise and flavour everything. We cooked the stew at 160 for a couple of hours so we added 3/4 of a box of Campbell's (1lt).
Preheat the oven to 200, and then put it down to 160 when you're about to put the pot in. Also get the stew bubbling on the stove top before it goes in the oven so that it's cooking away before you pop it in.
And that is that. Serve with some mash potatoes and green beans, or some brown rice - YUM! There is really nothing I love more than winter food and beautiful warming stews! I think I'm about to get another tutorial in making chicken pie tonight, so I'd better fill up that wine glass and get a pencil. There will be more Jamie in the next few weeks - I'm working on persuading chef extraordinaire
into making the duck confit from the French section!
Looking forward to hearing how the stews have gone!
Ciao
xoxo
Wednesday, April 27, 2011
What's for lunch on Easter?
So the loooonnnggg weekend has been and gone and our Easter Sunday lunch has been gobbled up, and I think I miss it a little! Can't wait to have everyone over again because this one was definitely a success! Our contributing partners were 6 friends and then us, and they supplied some pre-lunch nibbles, while the Chef was working his magic - a Butterflied lamb marinated in Spanish smoky paprika, garlic and lemon juice, and a Spatchcock chicken marinated in garlic and herbs. Both done to perfection on the Weber. The lamb was a little dry due to the fact that needed to be basted constantly, but I may have been the only 1 that felt this.
We served this with couscous and mash potatoes, a salad of mixed greens, and then cucumber and cherry tomatoes served separately. Lastly we had some homemade tzatiki and red cabbage mixed through with balsamic vinegar, spring onions and garlic. Quite a spread that went down pretty quickly!
I think made a gorgeous sorbet and it was super simple! Based on a Spanish cocktail, it was very easy to make up and delicious to eat.
So you'll need:
300g Castor sugar
300ml water
300ml Red wine - a Spanish wine like a Rioja, or a nice fruity Shiraz blend. This doesn't have to be fancy, a nice quaffable wine works best!
300ml fizzy lemonade
zest and juice of 1 lemon.
Dissolve the sugar in the water over a medium heat and then bring to a rapid boil for 5 to 7 minutes before the syrup starts to colour. Put aside to cool. Combine the wine, lemonade and lemon juice in a large jug and add the cooled syrup when it's ready. Give it a good stir and either put it into 1 deep freezer container to be used all at once, or divide it into smaller containers to be used at different times.
Pop in the freezer and give it a muss up with a fork every 15minutes for the 1st hour or so. When you're ready to serve it, put small quantities into a food processor to blend it up to be fluffy and smooth.
And you're done! We served this before dessert which was Gordon Ramsay's Dark Chocolate Torte served with pouring cream. This is in his Just Desserts book and was divine! Our oven runs a little hot so we'll take the temperature down next time, but otherwise it was lovely! Recipe to follow I promise!
Follow this and add to it with plenty of wine and some Easter choccies and it certainly was a fun day! Looking forward to thinking up our next dinner menu. I'm feeling French, classic and warm for these autumnal nights that are quickly turning to winter. Lamb shanks, Coq au Vin and delicious heart-warming meals here we come! I can't decide what I love most about winter - the clothes, the food or the red wine? Staying in with friends is definitely up there too.
Ciao
xoxo
Monday, April 18, 2011
And the weekend of food continued!
After the gastronomic extravaganza that was Sunday, Marty hit the pans again for a delicious dinner on Monday night too. He whipped up part of the following meal - the dauphinoise and the chicken - but I would definitely recommend adding some greens to this. The cream overload proved exactly that and I certainly felt guilty for not having the RDI of green veg!
The dauphinoise were spectacular, the chicken delicious and the link http://www.jamieoliver.com/recipes/chicken-recipes/mustard-chicken-quick-dauphinoise-greens too easy! My other recommendation for this meal is to perhaps separate the 2 creamy aspects into different meals. The reason being is that this foodie has not consumed that made rich dairy in months in one sitting and was very sick and unhappy the next day. I did think it was food poisoning at 1 point, but Marty wasn't sick and is so fastidious about cleanliness and the correct procedures when dealing with chicken that I knew it couldn't be that. It left me to believe that it was simply MY stomach that was being intolerant. If you eat rich food on a regular basis it may be fine for you, Marty consumes an incredible amount of dairy on a daily basis and was alright, but besides the daily - and sometimes not if I'm being good - flat white with 1, I don't do a lot of dairy.
The most unfortunate part of this all is that I LOVE Dauphinoise, and because I was so sick and lost my appetite - it's still misplaced - I didn't get to enjoy the leftovers.
Some time this week I'm going to update you on the Preservation Factory and how we did the preserved lemons. And I'll give you a sneak peek of what Easter Lunch is going to look like. Will there be another dessert collaboration? Will the lamb be traditional or is the Chef going to mix it up? Anyone have something exciting they're doing and would like to share? I look forward to hearing from you!
Ciao
xoxo
Saturday, April 16, 2011
Double Feature weekend - Chicken Tagine and Tiramisu..
Wow, what weekend of great food and cooking! Marty definitely got his groove back and decided to cook up a storm on Sunday! Chicken, Olive and Preserved Lemon Tagine followed by Tiramisu. I will say right up front I have never been a Tiramisu fan, but this one was unbelievably good. Not too heavy, beautiful flavours and quite simply to die for. The Chicken Tagine however I feel needs some work and a couple of adjustments, but to that later!
Before I go any further, here is the link for the Tiramisu recipe - because you have to go and try it: http://www.jamieoliver.com/recipes/other-recipes/best-tiramisu. I'll run you through the tagine recipe, and also let you know what would be the variations we'd do now. I think after the Beef tagine was such a success, I expected the same from this dish. Not that it wasn't, it just wasn't what I'd been expecting. In most Moroccan dishes there's this beautiful balance of sweet and savoury and spicy, as was the beef with the prunes and the Moroccan spices. This one was much saltier - should have guessed it by the name I suppose - and there are are definite things that can be done the next time we make this - because there will be a next time - to improve on this first experience and make it a dish to remember. I've learnt from Marty that the most important thing about cooking is a little experimentation, and when you're trying something new and it doesn't work, it's best not to give up, but tweak and adjust because that's where a beautiful dish can come from. I mean, Jamie does is a cookbook all about tweaking and updating traditional recipes!
The first step in the tagine is the preparation of the chicken.To serve 4-6 the recipe calls for a whole chicken, skin-on and jointed into 4. The butcher would be able to do it, but you can generally buy it like this in a 'barbeque' style pack. Then you need to prepare a rub for the chicken to marinate in consisting of:
When it's time to cook, you're going to brown the chicken in your casserole pot/tagine, and while that's happening you want to chop a fennel bulb into 8, chop a couple of onions, and get a good sized bunch of fresh coriander and cut the stalks off. That's the part you want to use. You can add these to the mix once that chicken is deliciously golden brown and mix around. Now here comes the exoticness! A good pinch of saffron, about 80gm of stoned black and green olives (1st bit of salt) and a preserved lemon, chopped up. 1 if it's homemade, 2 if it's store bought. Add about 500ml of hot stock, chicken and preferably organic, cover and simmer on a low heat for about and 1 and a half. It was more like 2 in the end. Keep an eye out and give it an occasional stir. Add water if it's starting to look dry, and if, when the chicken's cooked and it looks a little bit liquidy, let it blip away with the lid off for a little to thicken slightly (Jamie's words not mine! but it accurately describes the sound it makes!)
Serve with steaming couscous and a sprinkle of coriander leaves. It is such a simple delicious dish. However, whether it was the combination of cooking a little longer, preserved lemons being strong or the added olives I found it overwhelmingly salty. The lemons are preserved with salt - another subject for another post- so they have a lot going on already, and I did our homemade ones Marty's way without adding the cinnamon and bay leaves which would have helped to soften the flavour. They've also been preserving for about 3 months now so they're pungent. Next time I would only use half or a quarter instead of 1 for a more subtle taste. the olives themselves where salty, so the 3 variations I can see in the future are:
1. No lemons
2. No olives
3. No olives or lemons.
I'll get back to you on what combination worked best. I think that by halving the lemon and maybe the same for the olives will allow the rest of the dish to work without being overwhelmed by these strong flavours.
I have no variations for you on the Tiramisu, only to say it was simple to make - I helped with some of it, and absolutely delicious. the added egg whites to the mascapone meant that it wasn't a thick, heavy dessert and it wasn't overwhelmed with coffee and cream. I used freshly ground and percolated coffee as opposed to instant coffee and it made a lot of difference to a smooth and subtle taste.
Looking forward to hearing how it went when you make it!
Ciao xoxo
Before I go any further, here is the link for the Tiramisu recipe - because you have to go and try it: http://www.jamieoliver.com/recipes/other-recipes/best-tiramisu. I'll run you through the tagine recipe, and also let you know what would be the variations we'd do now. I think after the Beef tagine was such a success, I expected the same from this dish. Not that it wasn't, it just wasn't what I'd been expecting. In most Moroccan dishes there's this beautiful balance of sweet and savoury and spicy, as was the beef with the prunes and the Moroccan spices. This one was much saltier - should have guessed it by the name I suppose - and there are are definite things that can be done the next time we make this - because there will be a next time - to improve on this first experience and make it a dish to remember. I've learnt from Marty that the most important thing about cooking is a little experimentation, and when you're trying something new and it doesn't work, it's best not to give up, but tweak and adjust because that's where a beautiful dish can come from. I mean, Jamie does is a cookbook all about tweaking and updating traditional recipes!
The first step in the tagine is the preparation of the chicken.To serve 4-6 the recipe calls for a whole chicken, skin-on and jointed into 4. The butcher would be able to do it, but you can generally buy it like this in a 'barbeque' style pack. Then you need to prepare a rub for the chicken to marinate in consisting of:
- 1 heaped tsp coriander seeds, bashed up
- 1 level tsp ground cumin
- 1 heaped tsp ground ginger
- 2 tbs olive oil
- seal salt and freshly ground black pepper
When it's time to cook, you're going to brown the chicken in your casserole pot/tagine, and while that's happening you want to chop a fennel bulb into 8, chop a couple of onions, and get a good sized bunch of fresh coriander and cut the stalks off. That's the part you want to use. You can add these to the mix once that chicken is deliciously golden brown and mix around. Now here comes the exoticness! A good pinch of saffron, about 80gm of stoned black and green olives (1st bit of salt) and a preserved lemon, chopped up. 1 if it's homemade, 2 if it's store bought. Add about 500ml of hot stock, chicken and preferably organic, cover and simmer on a low heat for about and 1 and a half. It was more like 2 in the end. Keep an eye out and give it an occasional stir. Add water if it's starting to look dry, and if, when the chicken's cooked and it looks a little bit liquidy, let it blip away with the lid off for a little to thicken slightly (Jamie's words not mine! but it accurately describes the sound it makes!)
Serve with steaming couscous and a sprinkle of coriander leaves. It is such a simple delicious dish. However, whether it was the combination of cooking a little longer, preserved lemons being strong or the added olives I found it overwhelmingly salty. The lemons are preserved with salt - another subject for another post- so they have a lot going on already, and I did our homemade ones Marty's way without adding the cinnamon and bay leaves which would have helped to soften the flavour. They've also been preserving for about 3 months now so they're pungent. Next time I would only use half or a quarter instead of 1 for a more subtle taste. the olives themselves where salty, so the 3 variations I can see in the future are:
1. No lemons
2. No olives
3. No olives or lemons.
I'll get back to you on what combination worked best. I think that by halving the lemon and maybe the same for the olives will allow the rest of the dish to work without being overwhelmed by these strong flavours.
I have no variations for you on the Tiramisu, only to say it was simple to make - I helped with some of it, and absolutely delicious. the added egg whites to the mascapone meant that it wasn't a thick, heavy dessert and it wasn't overwhelmed with coffee and cream. I used freshly ground and percolated coffee as opposed to instant coffee and it made a lot of difference to a smooth and subtle taste.
Looking forward to hearing how it went when you make it!
Ciao xoxo
Friday, April 15, 2011
Patatas Bravas recipe
Much apologies because this has been a long time coming! I'm going to load up the recipe as directed by Jamie, but will also let you know what we did differently.
So Patatas Bravas actually means 'fierce potatoes', and these can be found in just about any tapas bar around the world in any number of variations. The thing that makes ordinary potatoes fierce is the spicy tomato sauce they're cooked and served in!
This recipe serves 4 as tapas, we used it as a side but had plenty left over!
You'll need:
For the bravas sauce
So, what you'll need to do first is parboil those potatoes over a medium heat for about 10 to 15 minutes, or until they're starting to get tender but still holding their shape. Drain in a colander and leave to steam dry until cool.
Meanwhile, put a pan on a low heat and start your bravas sauce. Add a lug of olive oil and, once hot, add the chopped onion and sliced garlic. Cook for 5 minutes or until the onion is soft but not coloured. Add the chillies, carrot and thyme leaves and cook for another 5 minutes. Add the tinned tomatoes, sherry vinegar and a good pinch of salt and pepper. Bring to the boil, then turn the heat down and simmer for 15 minutes or until the carrots are soft and the sauce is nice and thick.
While your sauce simmers, put a large frying pan on a medium heat and add 0.5cm of olive oil. Cut your potatoes into large bite-sized chunks. Once the oil is hot, carefully add your potatoes to the pan. You'll want to cook them for around 8 minutes, turning occasionally until golden all over. You'll need to do this in batches so that you don't overcrowd the pan. Add your garlic and rosemary leaves for the last minute of cooking.
Transfer the potatoes, garlic and rosemary onto a plate lined with kitchen paper to drain, then scatter over the paprika, fennel seeds and a good pinch of salt and toss together until well coated.
Carefully tip your sauce into a blender or use a hand blender and whizz until lovely and smooth - to be honest because we'd used the different sauce we kept it a little chunky and didn't blend. Have a taste and adjust the seasoning if necessary. Serve in a jug next to your potatoes, or if you'd rather be more traditional - as we did - pour the sauce over the potatoes and toss then serve. Keep any leftover sauce for a pizza base or pasta.
Enjoy!
xoxo
So Patatas Bravas actually means 'fierce potatoes', and these can be found in just about any tapas bar around the world in any number of variations. The thing that makes ordinary potatoes fierce is the spicy tomato sauce they're cooked and served in!
This recipe serves 4 as tapas, we used it as a side but had plenty left over!
You'll need:
- 4 medium potatoes, peeled and halved
- 2 cloves of garlic, peeled and finely sliced
- 2 sprigs of fresh rosemary, leaves picked
- 1tsp sweet paprika
- 1 tsp fennel seeds
- 1 tsp sea salt
For the bravas sauce
- olive oil
- 1 onion, peeled and finely chopped
- 4 cloves of garlic, peeled and sliced
- 3 fresh red chillies, deseeded and roughly chopped
- 1 carrot, peeled and finely chopped
- a few sprigs of fresh thyme, leaves picked
- 1 x 400g tin of chopped tomatoes
- 1 tbs sherry vinegar
- sea salt and freshly ground black pepper.
So, what you'll need to do first is parboil those potatoes over a medium heat for about 10 to 15 minutes, or until they're starting to get tender but still holding their shape. Drain in a colander and leave to steam dry until cool.
Meanwhile, put a pan on a low heat and start your bravas sauce. Add a lug of olive oil and, once hot, add the chopped onion and sliced garlic. Cook for 5 minutes or until the onion is soft but not coloured. Add the chillies, carrot and thyme leaves and cook for another 5 minutes. Add the tinned tomatoes, sherry vinegar and a good pinch of salt and pepper. Bring to the boil, then turn the heat down and simmer for 15 minutes or until the carrots are soft and the sauce is nice and thick.
While your sauce simmers, put a large frying pan on a medium heat and add 0.5cm of olive oil. Cut your potatoes into large bite-sized chunks. Once the oil is hot, carefully add your potatoes to the pan. You'll want to cook them for around 8 minutes, turning occasionally until golden all over. You'll need to do this in batches so that you don't overcrowd the pan. Add your garlic and rosemary leaves for the last minute of cooking.
Transfer the potatoes, garlic and rosemary onto a plate lined with kitchen paper to drain, then scatter over the paprika, fennel seeds and a good pinch of salt and toss together until well coated.
Carefully tip your sauce into a blender or use a hand blender and whizz until lovely and smooth - to be honest because we'd used the different sauce we kept it a little chunky and didn't blend. Have a taste and adjust the seasoning if necessary. Serve in a jug next to your potatoes, or if you'd rather be more traditional - as we did - pour the sauce over the potatoes and toss then serve. Keep any leftover sauce for a pizza base or pasta.
Enjoy!
xoxo
Thursday, April 07, 2011
Courgette recipe
After a couple of requests for this recipe, I thought I'd post it on here!
Enjoy friends! xoxo
Serves 6 to 8 as a side
2 tablespoons olive oil (or duck fat if not for veggies)
3 onions, peeled and very finely sliced
180g basmati rice
7 medium courgettes, finely sliced
500ml hot chicken or vegetable stock, preferably organic
4 heaped tbls crème fraiche
150g Emmental or Cheddar cheese, finely grated
Sea salt and freshly ground black pepper
Olive oil
Method
The secret to this very simple dish is to use the best stock you can find.
Preheat the oven to 190 C/Gas 5. Get a large frying pan on a low heat and add the olive oil (or duck fat) and a splash of water. Once melted and hot, add the sliced onions and cook for 20 minutes, stirring occasionally, or until soft and sticky. Meanwhile, rinse your rice under cold running water until the water runs clear.
When the onions look ready, add the sliced courgettes to the pan along with the rice. Mix them up then pour in the hot stock. Turn the heat up and cook for 5 minutes, stirring occasionally. You want the mixture to stay quite loose and oozy, so add a little more stock if needed. Take the pan off the heat and gently stir in the crème fraiche and 100g of your grated cheese. Add a good pinch of salt and pepper, then have a taste and adjust the seasoning if need be.
Lightly oil a roasting tray, gratin dish or casserole type pan, approx. 25cmx32cm. Tip everything into your prepared tray, making sure the rice is evenly distributed. Roughly flatten it out and try get most of the courgette on top to help keep in the moisture as it cooks. Sprinkle over the rest of the grated cheese.
Bake in the hot oven for 40 minutes, or until the top is golden and bubbling and the rice is beautifully cooked and has absorbed most of the liquid.
Can be served next to grilled meat or fish, or with a fresh salad.
Enjoy friends! xoxo
Thursday, March 17, 2011
A vegetarian surprise
It's always important to expand one's horizons, and as a confirmed carnivore, making and enjoying some vegetarian food is testing. I'm not a fan of tofu or soy, however my friend Kara made a gorgeous tofu and beetroot casserole which was superb and packed with flavour, and I really don't like mushrooms which everyone seems to put in and on most vegetarian dishes. What I do like are courgettes (zucchinis depending on where you're from) and Jamie makes a rocking courgette and rice dish which can be used as a main - as we did when Marty's cousin Rebecca came to visit. It's very similar to making a potato bake except that it has rice layered with courgette. It is also a fantastic alternative for those of us striving to be gluten-free, or as close to it as we can! I'm sure you'll agree with me, as a foodie - or even just as someone who loves to eat, it really is quite hard to cut out an entire food group. I keep myself to 75% - 85% each week. This basically means I have roughly 2-3meals that I can play around with, as long as I watch the rest of the week. The only exception is at the moment having toast for breakfast - wholegrain, and the occasional sandwich for lunch. On top of the gluten-free thing one has to remember to keep enough proteins in the diet, and also eat enough low GI food to stay full for longer, and if any one's a follower of Chinese medicine eating brown rice and whole grains is important for Spleen function. It's exhausting keeping up with everything! Sometimes I feel I have to have a glass of wine to plan my week's meals ;)


Ciao xoxo


The Courgette Gratin
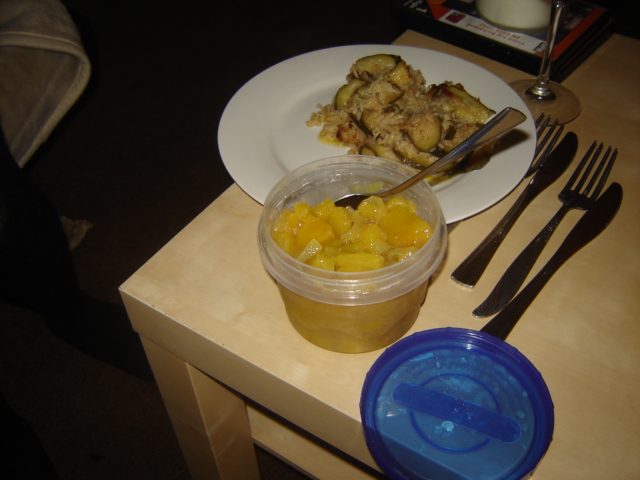
A side of curry pineapple
If anyone wants the recipe let me know and I'll send it along! Ciao xoxo
Monday, March 14, 2011
The Christmas Dessert showdown... Part 2.
Let me begin by quoting Jamie for this one, 'It's exotic, dramatic and absolutely delicious...' What chance did my humble trifle have? Marty made the amazing M'Hanncha with Date sauce and although I've searched for the recipe online, I must advise you to watch the series and grab the Jamie Does... cookbook. This is another nod towards Morocco, and another reason that we have to plan a holiday there in our future. Just another example from a fabulous place that they have some exciting and appealing cuisine.
This was a work of art when Jamie did it, and I'm sure with plenty of practice we'll get it looking the same, and although it wasn't an exact replica it was impressive. I have never seen anyone make quite so much mess though! The pictures tell a great story, and this was delicious days after warmed with ice-cream.
I also know that many chefs have tempers and are foul-mouthed, but I haven't heard one of them ever say those things to filo pastry before. Let's suffice it say that it was a b@#%ch to deal with! The method to make this is complex in the execution as it requires a quick hand to keep the pastry pliable, put the filling down, and then roll it into a snake shape. Frustrations abound. But it was delicious, dramatic and worthwhile, and sometimes a picture really does say a thousand words. Enjoy.


And that my friends is the finished product! Not quite the same as the picture in the cookbook, but super delicious!!
Ciao xoxo
Friday, February 25, 2011
Jamie vs. Gordon. The Christmas dessert showdown... Part 1
Unfortunately the only glass dish I had had been smashed a few months prior, and never replaced. A mad dash around on the 23rd was fruitless, so there's no side view. I layered the Madeira cake - about a 3rd of it - on the bottom, chopped into bits. Then in the blender whipped up a 3rd/half of the raspberries and strawberries with castor sugar and some water, and mixed that in with the remaining full berries. Lastly, followed his recipe for custard very carefully. This whole recipe can be found in 'Gordon Makes it Easy', which is my favourite and most useful Gordon Ramsay cookbook, and definitely in our top 5 overall. The Madeira cake was layered with the fruit, then topped with the custard. and into the fridge overnight.
This left the other dessert up to Marty, and that you'll need to wait for in part 2 on Monday or Tuesday! See you then.
xoxo

Bon Appetite xoxo

It's been a while my friends...
While experiencing some downtime in Christchurch, I thought I'd take a little time to add some much needed updates. We have still been working our way through Jamie's book, and once I hit Melbourne again I'll let you know some awesomely easy recipes to whip up at home. We've done a great Chicken and Avo dip pita, an amazing Courgette and rice dish - perfect for veggies or as a side dish, and I'll definitely be telling you about the Moroccan dessert we had for Christmas.
Most importantly I can't wait to tell you about our 'Preservation Factory' we've started. Sun dried Tomatoes fresh from the vine, Basil oil and Garlic oil, and by now the lemons must be preserved! Hopefully our amazingly abundant Roma tomato tree will still be producing and maybe we'll make some chutneys. This is where I'd love to hear from you all - do you have a family fave, a special jam or relish recipe that you think is awesome and we can make. We're on the hunt for exciting things to do, and interesting vessels to preserve them in! I'll pop up photos when we have some on our shelves I need to clear.
Looking forward to hearing those suggestions!


xoxo
Most importantly I can't wait to tell you about our 'Preservation Factory' we've started. Sun dried Tomatoes fresh from the vine, Basil oil and Garlic oil, and by now the lemons must be preserved! Hopefully our amazingly abundant Roma tomato tree will still be producing and maybe we'll make some chutneys. This is where I'd love to hear from you all - do you have a family fave, a special jam or relish recipe that you think is awesome and we can make. We're on the hunt for exciting things to do, and interesting vessels to preserve them in! I'll pop up photos when we have some on our shelves I need to clear.
Looking forward to hearing those suggestions!

The Chicken and Avo wrap...

xoxo
Thursday, January 06, 2011
Off the Beaten Track... a new grain for a New year!
About 2 months ago, at the market, I decided to buy a new type of grain - quinoa (pronounced keen-wa). At our favourite nut-and-grain place it promised to be a great substitute for rice and could be used in salads, etc. I didn't get to making it, but I thought tonight would finally be the night. What sparked this sudden interest was 2 things - firstly, I read about it in Madison in their detox article. It is a high protein, low GI food source which is phenomenal for the body. Secondly, I pulled out my list of 'Foods to avoid, Foods to eat' from the natropath and low-and behold there it was on 'Foods to eat'. And since I've been told gluten and wheat are NOT my friend, and sweet potato, pumpkin and occasionally couscous or brown rice get a little boring, I thought it was now or never to try it out.
The good news and the average news. The good news, you cook it for 10 - 12 minutes. 10 is good, 12 is actually overcooked. It has a great crunch to it and was perfect for what I made it for. Average news - because it's not bad- it doesn't have a lot of it's own flavour. It's more like couscous than brown rice in that respect. Season it well and mix it with great flavours and you'll be sorted. The recipe I saw it with was for poached chook, avocado and cherry tomatoes tossed with the quinoa and olive oil and lemon juice to flavour.
I made it slightly differently. I cooked off some courgettes, yellow peppers and snow peas until they were al dente while the quinoa was cooking. I chopped up some cherry toms, added a little feta and mixed these with the hot veggies in a bowl. I grilled a lamb chop to have with it, strained the quinoa and mixed it up with the veg. Now here's where the bonus of the quinoa not having too much flavour comes in. The flavour of the veg and feta comes through and you get a lovely crunchiness.
So, for everyone who's made silly New Years resolutions, for anyone who is trying a healthier diet, for anyone who's looking for an alternative to a gluten or wheat product - try it! It actually comes as a plain colour, black and a red. If you can find the mix like I did, it looks great!
Enjoy and let me know if you've come up with some interesting combinations :)
xx
Sunday, January 02, 2011
Venetian steaks and Spanish Patatas Bravas!
So it was about a month ago since this particular meal, so I hope I can recall all the details! I do remember that I had been to the gym for a very strenuous workout, hadn't eaten well all day and by the time we needed to hit the supermarket, I was particularily 'hangry' (hungry + angry! Good phrase!!). The need for food and soon outweighed the lengthy discussions that would normally take place and with some beautiful ribeye on special - decision made! Now the recipe isn't online because it is 'dead simple' to quote Mr Oliver. Steak, olive oil, salt and pepper, garlic and some fresh rosemary rubbed over the steak. Pop it onto a grill/bbq/braai or a good grill pan on the stove and cook to your specifications! If you'd like to infuse the meat with loads more flavours, rub the meat with all the above, and put it all together and covered in the fridge for 5-6 hours.
From Jamie - some guidelines to cooking your steak: "As a general guideline, cooking the steak for 10 to 12 minutes will give you a blue to rare meat. 15 to 17 miuntes will give you rare to medium rare, and around 20 to 22 minutes will give you medium...Once cooked to your liking transfer to a plate for 5 miuntes to rest."
Now to make this dish Venetian Style it is best served with a great little salsa! What you'll need for the salsa is:
1 Fresh chilli
8 cherry tomatoes - I used fresh tomatoes from our tree and the pecorino ones you buy. the combination was good
1 clove of garlic, peeled
a smalll bunch of free flat-leaf parsley
a small bunch of basil - again from the garden:)
1 tablespoon balsamic vinegar
3 tablespoons extra virgin olive oil
50g ricotta or feta cheese. I used feta.
I'm using 'I' because Marty was making the potatoes at this stage, and I whipped up the salsa. Seasoning a la Ainsley, and lugging in the olive oil, my instincts kicked in and the taste was good! A bit of practice before I made my avocado dip the following weekend!
And now onto the potatoes! Well, these feisty little potatoes actually translate to 'fierce potatoes'. Kinda the way we were feeling having not eaten all day! Now, no matter where you go for tapas you will find these babies on the menu. A particular favourite that I've just had was at Hairy Canary on Little Collins St, a must for anyone that likes tapas! Now the recipe is alluding me and sleep is calling me so I'll update it fully tomorrow for you when I tell you about the fabulous chicken and avo wraps we did!


 These potatoes can be used as a great side dish for most meals as well, and we'll definitely be doing them with our next bbq!
 The finished product!
Ciao xx
From Jamie - some guidelines to cooking your steak: "As a general guideline, cooking the steak for 10 to 12 minutes will give you a blue to rare meat. 15 to 17 miuntes will give you rare to medium rare, and around 20 to 22 minutes will give you medium...Once cooked to your liking transfer to a plate for 5 miuntes to rest."
Now to make this dish Venetian Style it is best served with a great little salsa! What you'll need for the salsa is:
1 Fresh chilli
8 cherry tomatoes - I used fresh tomatoes from our tree and the pecorino ones you buy. the combination was good
1 clove of garlic, peeled
a smalll bunch of free flat-leaf parsley
a small bunch of basil - again from the garden:)
1 tablespoon balsamic vinegar
3 tablespoons extra virgin olive oil
50g ricotta or feta cheese. I used feta.
I'm using 'I' because Marty was making the potatoes at this stage, and I whipped up the salsa. Seasoning a la Ainsley, and lugging in the olive oil, my instincts kicked in and the taste was good! A bit of practice before I made my avocado dip the following weekend!
And now onto the potatoes! Well, these feisty little potatoes actually translate to 'fierce potatoes'. Kinda the way we were feeling having not eaten all day! Now, no matter where you go for tapas you will find these babies on the menu. A particular favourite that I've just had was at Hairy Canary on Little Collins St, a must for anyone that likes tapas! Now the recipe is alluding me and sleep is calling me so I'll update it fully tomorrow for you when I tell you about the fabulous chicken and avo wraps we did!

2 stunning pieces of meat from the local butcher!


Ciao xx
Subscribe to:
Posts (Atom)